- Published on
Parallel Vibe Coding: Using Git Worktrees with Claude Code
11 min read- Authors

- Name
- Daniel Mackay
- @daniel_mackay

- Introduction
- The Problem with Shared Working Trees
- What Are Git Worktrees?
- Native Git Worktree Commands
- Using Worktrees Directly in Claude Code
- VS Code Support for Worktrees
- How Pull Requests Work with Worktrees
- What Happens When You Have Changes on Both a Regular Branch and a Worktree?
- A Practical Parallel Workflow
- Summary
- Resources
Introduction
Here's a scenario I bet you've hit. You're running Claude Code on a meaty refactor — moving a service layer, updating tests, the whole thing. It's going to take five minutes at least. So you sit there watching the spinner, because you can't exactly start another task on the same branch. The files are mid-change. The working tree is dirty. You're stuck.
The natural instinct is to do a fresh git clone of the repo into a second directory and work there. It technically works — two separate clones, two Claude sessions running in parallel. But it's painfully heavyweight. Modern codebases are large. A repo with full git history, assets, and dependencies can easily be several gigabytes. Cloning it again just to run a parallel task means waiting for the entire history to download, running npm install or dotnet restore again, and doubling your disk usage. For every additional parallel task, you pay that cost again. It doesn't scale.
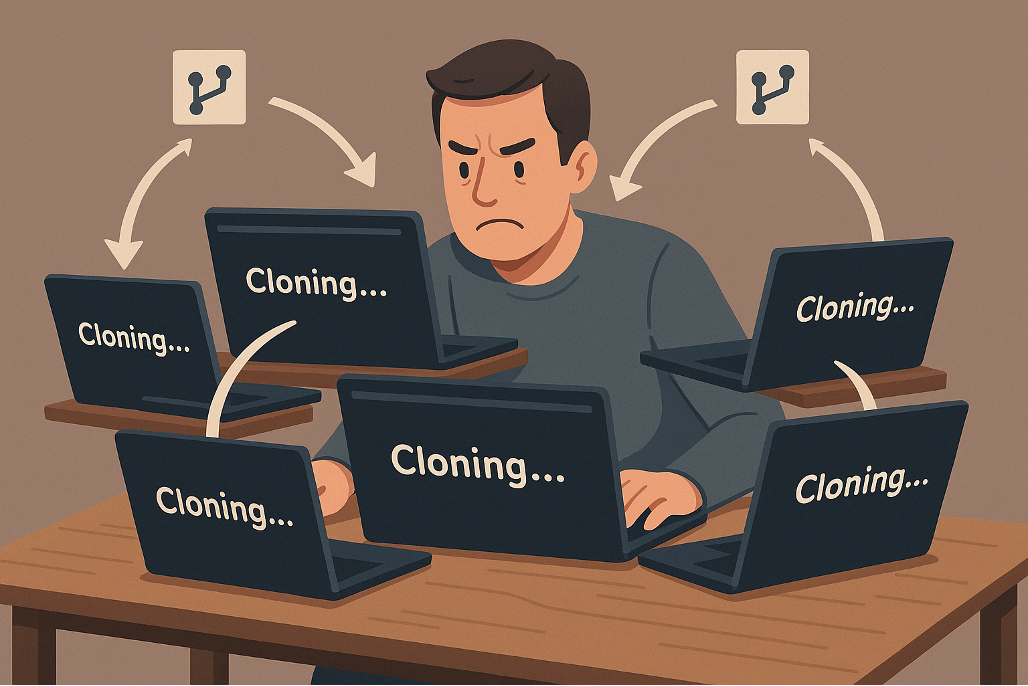
There's a better way: git worktrees.
Worktrees are one of those git features that most developers have never needed — until they start running parallel AI sessions. Then suddenly they're essential. In this post I'll walk through what the problem actually is, how worktrees solve it, and how to wire them up with Claude Code for a smooth parallel workflow.
The Problem with Shared Working Trees
When you run Claude Code (or any vibe coding agent), the agent reads and writes files directly in your working directory. That's the whole point — it can see your code and make changes to it.
The problem is that a git repository only has one working tree by default. Every branch you check out lives in the same set of files on disk. So if Claude is halfway through generating a new feature on feature/payments, your working directory is in a partially modified state. You cannot:
- Check out a different branch to work on something else
- Run another Claude session that touches different files safely
- Even meaningfully look at what another branch looks like
You're serialised. One task at a time. 🐌
With AI agents getting fast enough to complete real tasks, this bottleneck becomes painful. You want to fire off tasks and let them run in parallel while you review what's already finished. That's exactly what worktrees enable.
What Are Git Worktrees?
A git worktree is an additional working directory attached to the same repository. Each worktree has its own checkout of a branch and its own independent set of files on disk — but they all share the same git history, objects, and config.
Think of it like this: instead of one folder with your repo, you get multiple folders, each on its own branch, all pointing to the same underlying git database.
my-project/           ← main worktree (main branch)
my-project-payments/  ← linked worktree (feature/payments)
my-project-refactor/  ← linked worktree (feature/refactor)
Each of those directories is fully independent. You can run Claude Code in all three simultaneously, and they won't interfere with each other at all.
Native Git Worktree Commands
Worktrees are a standard git feature — no plugins, no extensions required. Here's the basic syntax:
Add a new worktree on a new branch:
git worktree add ../my-project-payments -b feature/payments
Add a worktree for an existing branch:
git worktree add ../my-project-payments feature/payments
List all worktrees:
git worktree list
Remove a worktree when you're done:
git worktree remove ../my-project-payments
The ../ puts the worktree directory as a sibling of your main project folder, which keeps things tidy. You can put it anywhere you like — it's just a path.
That said, doing this manually for every task is a bit of ceremony. You're creating directories, naming branches, then manually pointing Claude at the right path. It works, but there's a nicer way.
Using Worktrees Directly in Claude Code
Claude Code has native built-in support for worktrees via the --worktree flag (or the shorthand -w). Instead of manually running git worktree add and then pointing Claude at the new directory, you do it in one step:
claude --worktree feature-payments
Or equivalently:
claude -w feature-payments
Claude creates an isolated worktree at .claude/worktrees/feature-payments/ inside your repo, checks out a new branch there, and starts a session scoped entirely to that directory. Your main working tree is untouched. If you skip the name, Claude auto-generates one for you.
Open a second terminal, fire off another task in its own worktree, and now you've got two Claude sessions running in parallel — each on their own branch, each with their own files on disk, zero interference:
# Terminal 1
claude -w feature-payments

# Terminal 2
claude -w bugfix-auth
That's the whole workflow. No git stash, no directory juggling, no worrying about half-modified files. The real power is that while Claude is working in one worktree, you can be reviewing what finished in another. You're not waiting — you're directing.
Cleanup is handled for you too. When you exit a Claude session that was started with --worktree, Claude prompts you asking whether you want to keep the worktree or remove it. If the work is done and merged, you can bin it immediately. If you're mid-task and plan to come back, keep it — the branch and files stay right where they are, ready for you to resume.
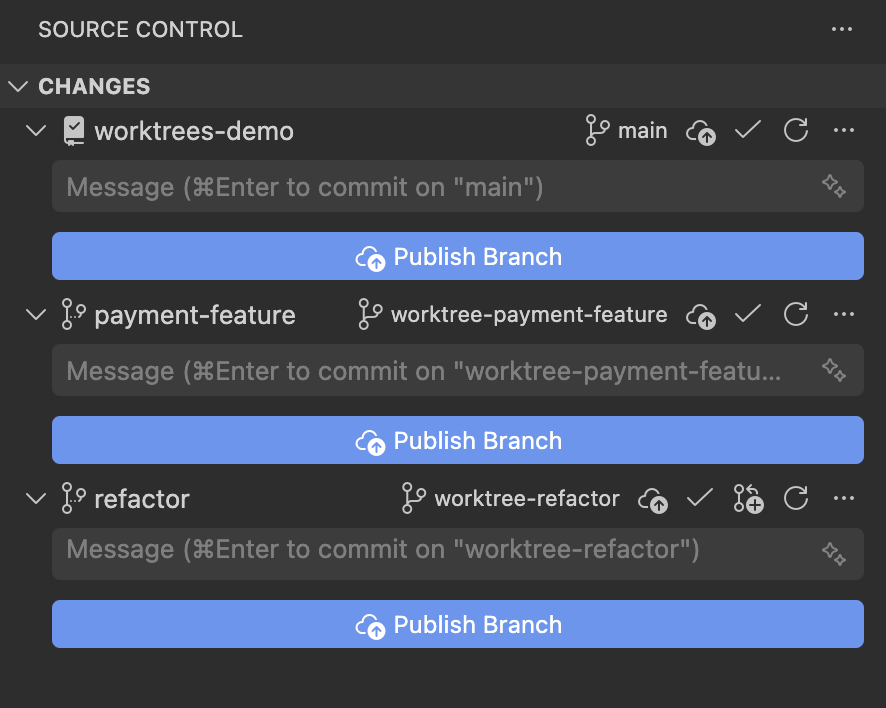
VS Code Support for Worktrees
Good news if you're a VS Code user: worktrees work natively. You can open any worktree directory as a VS Code workspace, and it behaves exactly like opening any other git repo. The Source Control panel shows the correct branch, you can stage and commit, and GitLens (if you have it installed) handles worktrees properly too.
From here you have two options:
Option 1 — Open a new VS Code window per worktree. Each window is scoped to a single branch, with its own Claude session running alongside. You can switch between windows to check progress on each task.
Option 2 — Open the repo root. VS Code lists all active worktrees in the Source Control panel, giving you a birds-eye view of everything in flight at once.
I prefer Option 2. When you're spinning up worktrees quickly it's easy to lose track of ones that are still floating around — opening at the root makes it obvious what's still active and what needs cleaning up.
How Pull Requests Work with Worktrees
This is where worktrees shine for a real-world workflow. Each worktree is on its own branch, so raising a pull request is identical to what you'd normally do — the branch exists in git, you push it, you open a PR.
# In the worktree directory for feature/payments
git push -u origin feature/payments
gh pr create --title "Add Stripe payment integration" --base main
Or just let Claude do it. If Claude has already been working in that worktree, you can ask:
Push this branch and create a pull request for it targeting main
Claude will handle the push and PR creation, and because it's operating in the worktree directory, it's automatically on the right branch. No risk of accidentally pushing from the wrong place.
Once the PR is merged, cleaning up is straightforward:
git worktree remove ../my-project-payments
git branch -d feature/payments
The worktree is gone, the branch is deleted, and your main working tree was never touched throughout the whole process. That's the workflow at its cleanest.
What Happens When You Have Changes on Both a Regular Branch and a Worktree?
This is a question that trips people up the first time. Let's say you have some work-in-progress on your main branch (or whatever branch your primary worktree is on), and you also have a Claude session running in a linked worktree.
The short answer: they are completely independent. Changes in the linked worktree don't affect your main working directory at all, and vice versa. They share git history but not the working tree files.
Where things get interesting is merging. If both branches have diverged — say, your main worktree has changes to Services/PaymentService.cs, and your linked worktree also touched that file — you'll have a merge conflict when you eventually combine them. Same as any two branches diverging. Worktrees don't introduce anything new here; they just let it happen in parallel rather than sequentially.
One gotcha worth knowing: you can't check out the same branch in two worktrees at once. Git enforces this. If you try to add a worktree with a branch that's already checked out in another worktree, you'll get an error:
fatal: 'feature/payments' is already checked out at '/path/to/main-worktree'
The fix is simple — use a different branch, or remove the existing worktree first. Each branch can only live in one worktree at a time.
Another thing to be aware of: stashes are shared across all worktrees (they live in the git object store), but the working directory state is not. So if you git stash in one worktree, that stash is visible from any other worktree. This can be useful, but it's also easy to get confused about which stash belongs to which context. My advice: avoid stashing when you're using worktrees. The whole point of worktrees is that you don't need to stash anymore.
A Practical Parallel Workflow
Here's how I actually use this day-to-day when I have multiple tasks I want Claude to tackle simultaneously:
1. Start with your repo on main (or your base branch):
cd my-project
git pull origin main
2. Add .claude/worktrees to your .gitignore:
echo ".claude/worktrees" >> .gitignore
Since Claude places worktrees inside your repo directory, you don't want them accidentally showing up as untracked files or getting committed. Add this once and forget about it.
3. Spin up a Claude session per task, each in its own worktree:
# Terminal 1
claude -w feature-payments

# Terminal 2
claude -w feature-auth
3. Give each session its task and let them run in parallel.
4. When a task is done, ask Claude to push and raise the PR before exiting:
Push this branch and create a pull request targeting main
5. Exit the session — Claude will ask if you want to keep or remove the worktree. Remove it if the work is done.
What used to be serialised — wait for task A, review, merge, start task B — becomes genuinely parallel. Claude is doing the implementation work across multiple branches simultaneously, and you're doing the high-value work of reviewing and directing.
Summary
Git worktrees are the missing piece for anyone trying to run Claude Code (or any vibe coding agent) at full speed. Instead of being serialised to one task at a time, you get truly parallel branches with completely isolated working directories.
The key takeaways:
- Worktrees are native git — no extra tooling required, just
git worktree add - Claude Code understands worktrees — you can ask it to create and operate in one directly
- VS Code handles them natively — open each worktree as its own window
- PRs work exactly the same — each worktree is just a branch, push and raise as normal
- Changes are isolated — worktrees share git history but not working directory state; merges happen when you combine branches, just like normal
The first time you kick off two Claude sessions simultaneously and watch them both making progress without any interference, it genuinely changes how you think about AI-assisted development. Give it a try.